


Selleys Liquid Nails Fast Grab
Selleys Liquid Nails Fast Grab is a high strength construction adhesive that provides strong initial holding power. The water-based formulation is low odour and allows for easy clean up.
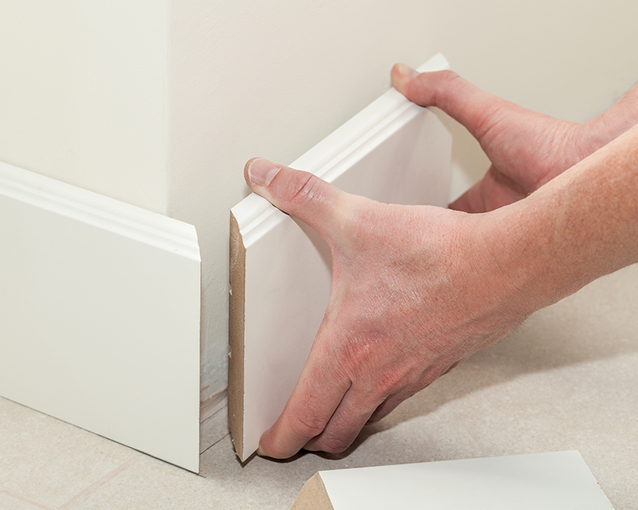
Skirting boards don’t just finish the design of the room, they protect the bottom of the wall from getting scuffed and damaged. Yet skirting boards often display signs of wear and tear due to marks and dents from previousor if you have small children or pets bumping against them.
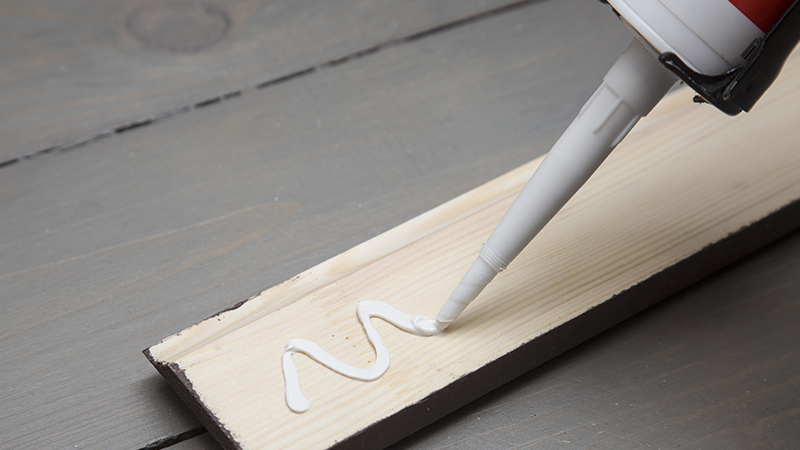
Selleys Liquid Nails Fast Grab is a high strength construction adhesive that provides strong initial holding power. The water-based formulation is low odour and allows for easy clean up.
Selleys No More Gaps Multipurpose gap filler delivers a smooth finish and because of its superior flexibility and low shrinkage, those unsightly gaps and cracks won’t re-appear.
Selleys Original Sugar Soap is a professional strength and high performance formula which powers through tough grease and grime. Its also recommended for cleaning surfaces prior to painting and wallpapering.
If you've got kids, at some point, you're going to have to deal with a hole in a plaster wall. But here is a 4 step solution that will make your wall look as good as new.
When looking to repaint your walls, you might be tempted to just pick up a brush and go. Here are a few painting fundamentals to consider that will save you valuable time and effort.
Patios and timber decks are great for extending your living area and are the ideal space for entertaining and relaxing.
Step by step guide on how to install cornices


Share
Share this article with your friends